مشكلة الصور فى موقعك
كثيرا ما يواجهنا مشكلة عند رفع الصور الى موقعك فتجدها اما كبيرة الحجم او صغيرة فلا هذه تعجب القارئ ولا هذه تكون لطيفة حين لا ترى الا جزء من الصورة وهو ما يبحث عنه مديرى المواقع تحت مسمى مشكلة الصور فى موقعك.
الان هذا هو الحل
اضافة جميلة جدا ومميزة تسفعك هو
يمكنك التحميل من هنا
اعادة ضبط الصور تلقائيا فور رفعها على المقال او الصفحى عندى فى الموقع .
Resize Image After Upload
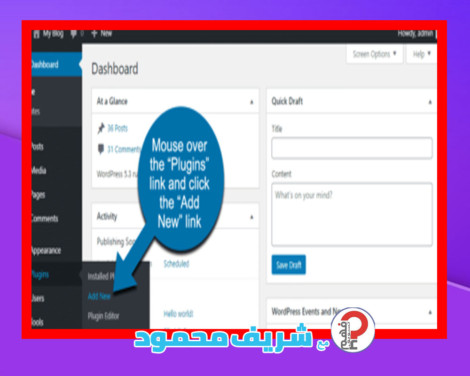
Log in to your WordPress admin panel.
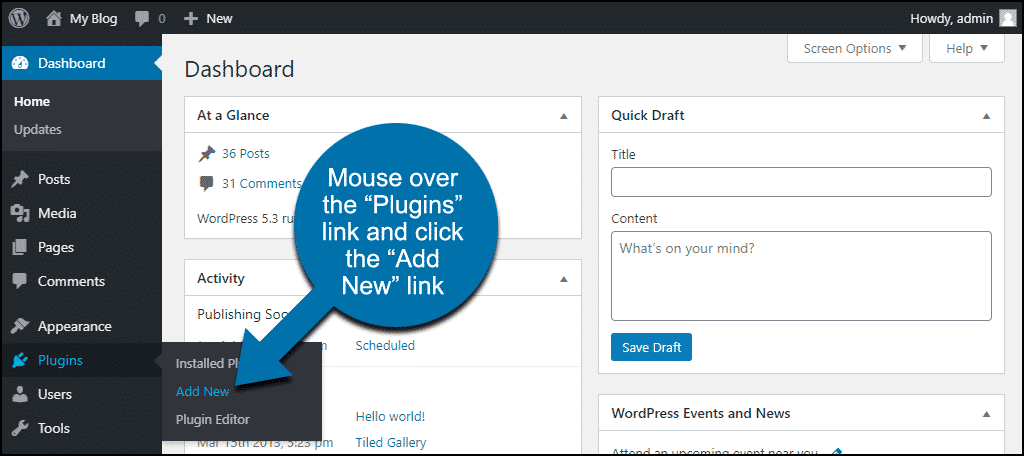
In the left column navigation, mouse over the “Plugins” link and click the “Add New” link.
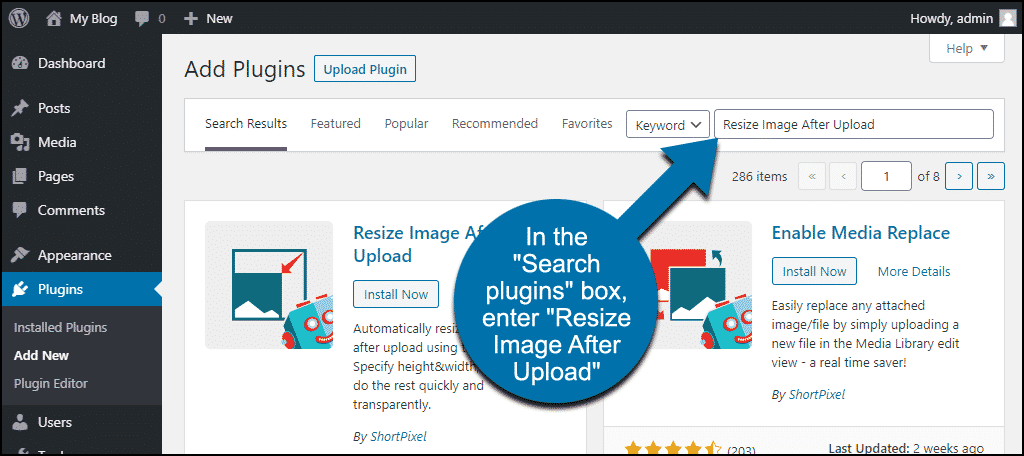
In the “Search plugins…” box, enter “Resize Image After Upload.”
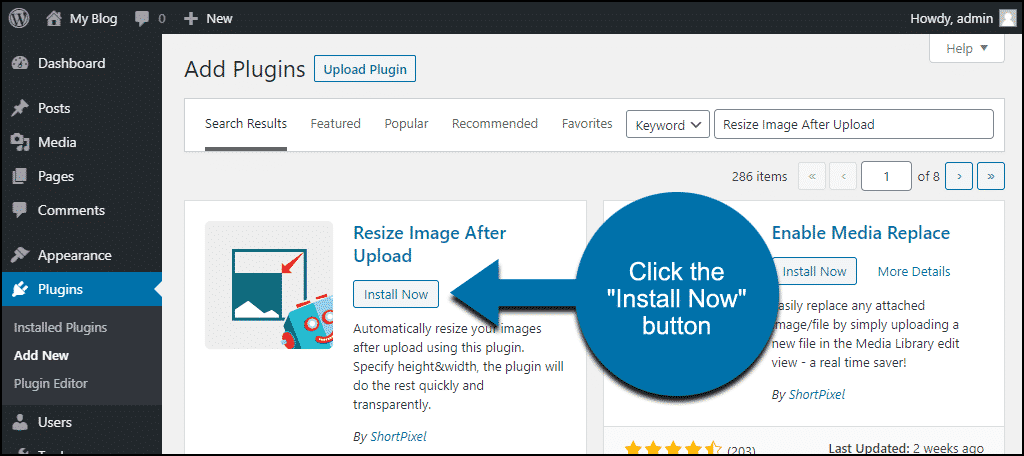
Once you have located the plugin, click the “Install Now” button.
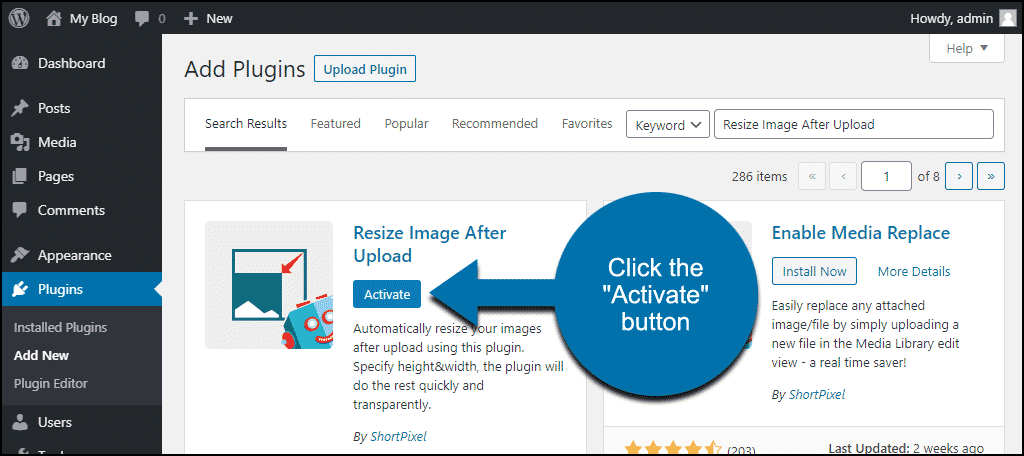
Click the “Activate” button.
Configuring Resize Image After Upload
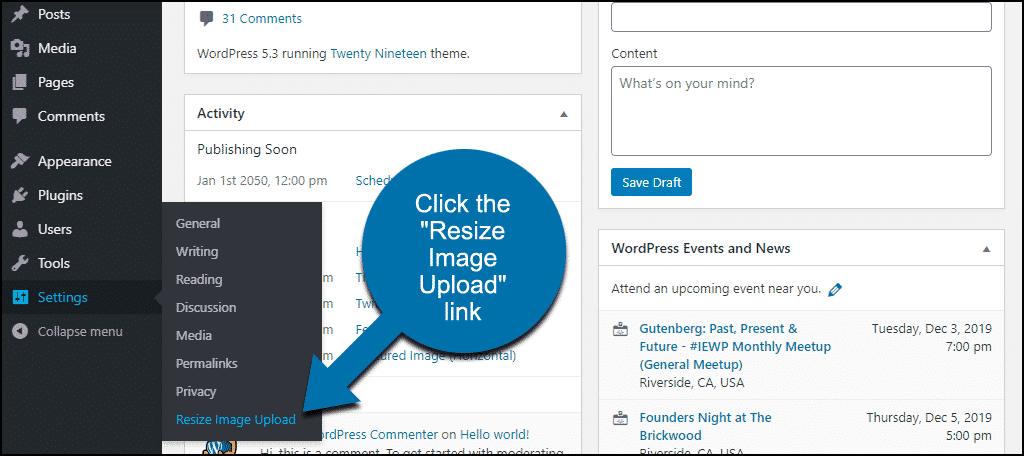
In the left column navigation, mouse over the “Settings” link and click the “Resize Image Upload” link.
The plugin configuration is pretty straightforward; all the options are on one page. Make sure to click the “Update Options” button down at the bottom of the page after making any changes.
Re-sizing options
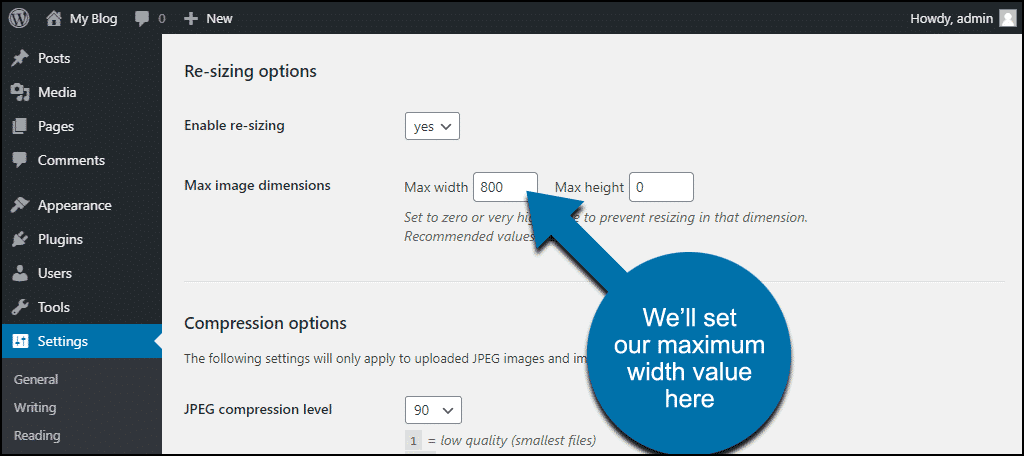
In the “Re-sizing options” section, the “Enable re-sizing” drop-down option should be set to “yes” by default. If it isn’t, we want to set it to “yes.”
The “Max image dimensions” settings are where we will control the size of the resized images. For our theoretical 800-pixel width page, we want to resize our images in WordPress by setting the “Max width” to 800. Since we aren’t concerned with image height, we’ll set “Max height” to 0 (so the plugin will convert the height in proportion to our new width, and not to a specific pixel size).
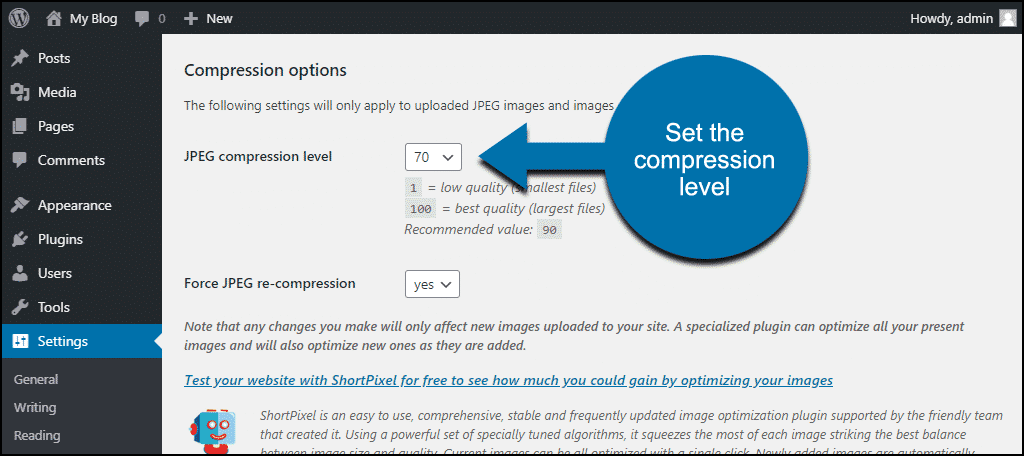
كما توفر الاضافة ايضا ضغط الصور
If you want to force your compression value on uploaded images, set “Force JPEG re-compression” to “yes.”
Image conversion options
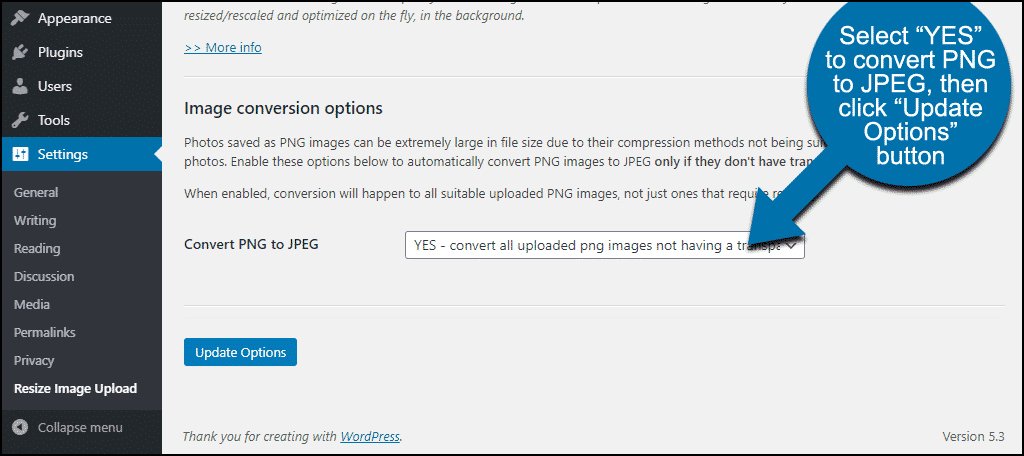
The “Image conversion options” section lets you choose whether to convert PNG images to JPEG.
If you upload photographs in the PNG format, you may want to use this conversion feature. Photographs in the PNG format are large files and can always be made smaller by conversion to JPEG with little noticeable loss of quality.
If you upload a lot of PNG illustrations, you probably don’t want to convert them to JPEG, so you can bypass this option.
To activate PNG to JPEG conversion, select “YES” in the “Convert PNG to JPEG” drop-down.
Okay, Let’s Auto-Resize an Image
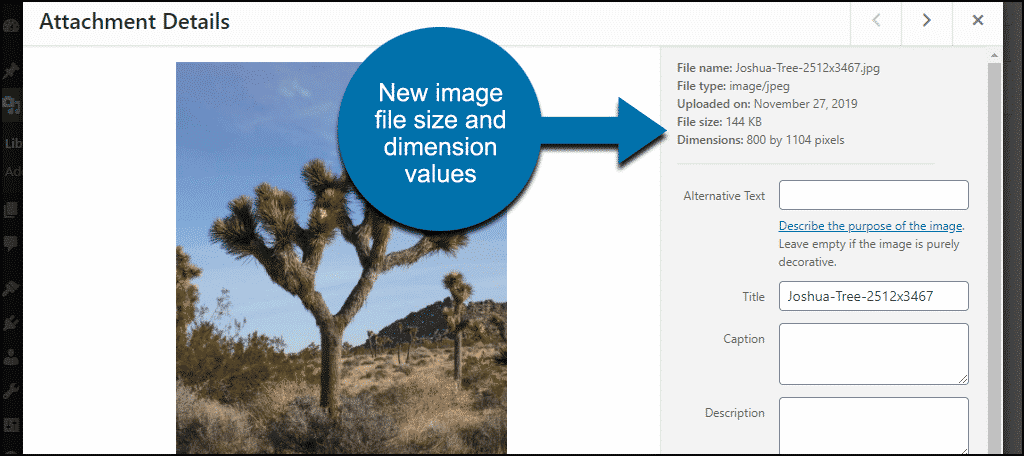
I’m starting with a 1.6 MB image file, with dimensions of 2512 x 3467 pixels. Let’s see what happens when I upload it.
As you can see, the file size was reduced to 144 KB (a 91% size reduction!) and the dimensions to 800 x 1104 pixels. Just as we expected.
بهذا تكون قد وصلت الى حل مشكلة الصور فى موقعك

